Children who can write beautiful handwriting will not only gain extra points in their studies, but also add brilliance to their future life.
So as a parent, how can you teach your children to practice calligraphy more effectively?
1. Correct pen holding posture
I believe that every child has a copybook at home. There is basically a picture of the correct posture for holding a pen at the beginning of the copybook. Parents, have you studied it carefully?
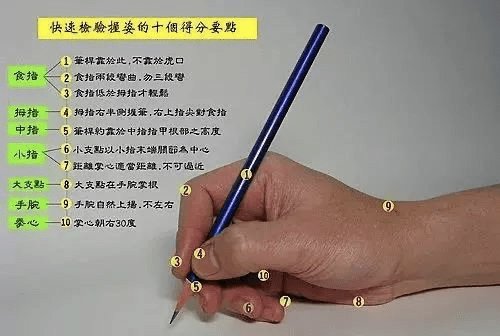
How to hold a pencil
Angle: The angle between the pen and paper is approximately 50-75 degrees.
Holding the pen: The thumb should not be placed on the index finger, or the index finger should be placed on the thumb. The thumb and index finger should remain slightly apart.
The pad of the index finger, the right half of the pad of the thumb, the first interphalangeal joint of the middle finger and the metacarpophalangeal joint of the index finger are in contact with the pen;
Force-generating points: The pulp of the index finger, the right half of the pulp of the thumb are the main force-generating points, the first interphalangeal joint of the middle finger is the secondary force-generating point, and the metacarpophalangeal joint of the index finger is used for positioning.
When writing strokes such as "hook" from the lower right to the upper left, the ring finger should assist the middle finger in kicking the hook, and should not lie softly on the paper.
Finger condition: During the writing process, your fingers should be relaxed and natural. You must not tighten the pen tightly or force yourself to compete with the pen.
The way to hold water pens such as gel pens and rollerball pens is basically the same as holding pencils.
However, because the gel pen transports ink to the paper through liquid capillary action, it is easier to write strokes, so the pen can be held lighter.
The second point mentioned in the picture, that the index finger should be bent in two sections and not in three sections, can be ignored.
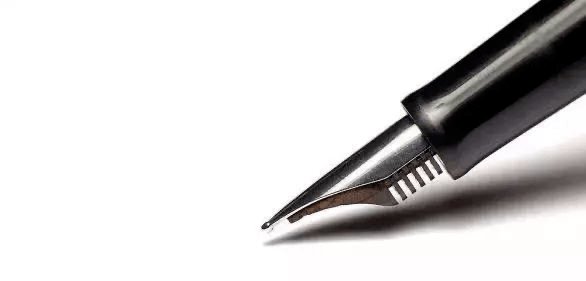
How to hold a pen
The way you hold a pen is different from the way you hold a pencil. The difference is:
When a pencil gel pen is writing, the effective force on the paper is perpendicular to the paper surface; while a fountain pen presses the steel piece of the pen tip to deform the pen tip, and the ink is injected into the paper from between the steel pieces. Therefore, during the pen writing process, the effective force should be the force that deforms the steel sheet, not the force perpendicular to the paper surface.
Therefore, the key points for writing a fountain pen are:
Penholder position: The penholder should rest on the tiger's mouth, not on the metacarpophalangeal joint of the index finger as before when holding the pencil.
Angle: The angle between pen and paper is about 40-55 degrees.
Examples of incorrect writing
Error 1:
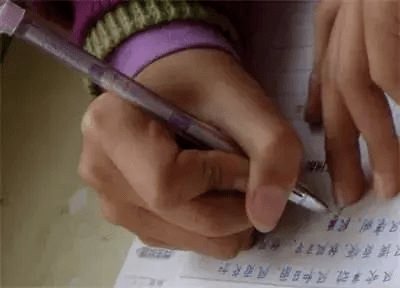
The picture above is one of the most common mistakes. The mistake is to clasp the index finger with the thumb, hold the pen too tightly, and lose flexibility. Many girls like to use this method, so the words they write are mostly neat, one stroke at a time, with few continuous strokes, but it is too formal.
Error 2:
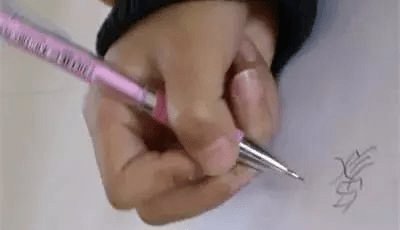
The posture in the picture above is to use the ring finger to hold the pen barrel. The index finger, middle finger and thumb are all exerting force, and the range of movement and stability of the pen tip will be adversely affected.
Error 3:
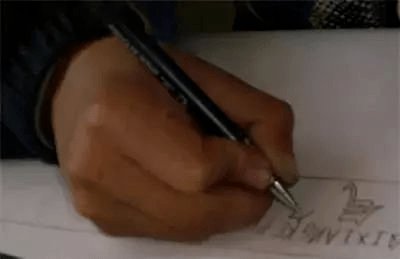
The index finger in the picture above presses the pen barrel too tightly, which makes it easy to become stiff and fatigued, and the pen is held too far down, which greatly affects the flexibility. Secondly, the pen barrel is leaning against the tiger's mouth, and the inclination is too large, which is not the appropriate angle for the pen tip to enter the paper.
Whether the writing posture is reasonable or not, on the one hand, you can refer to the correct demonstration in the previous article, and on the other hand, you must also combine the child's own feelings to find out how to write more gracefully, smoothly and naturally, and find what suits the child. Being able to write well is the ultimate goal.
If there are mistakes in writing, be sure to supervise the children to correct them. This will benefit them throughout their lives.
2. Prepare a Tian-zi grid or a rice-zig exercise book
Tian Zi Ge and Mi Zi Ge are important tools for analyzing the length, thickness, angle, radian and mutual relationship of strokes.
Without the Tian character grid and the rice character grid, it is difficult to practice calligraphy!
3. How to choose copybooks
For students who have a certain foundation, I recommend ancient tablet stickers, because all contemporary calligraphers practice calligraphy in this way.
What are the ancient inscriptions, such as the 43-line ink copy of Zhong Shaojing's "Ling Fei Jing" in small regular script.
It is recommended for students with a certain foundation to post.
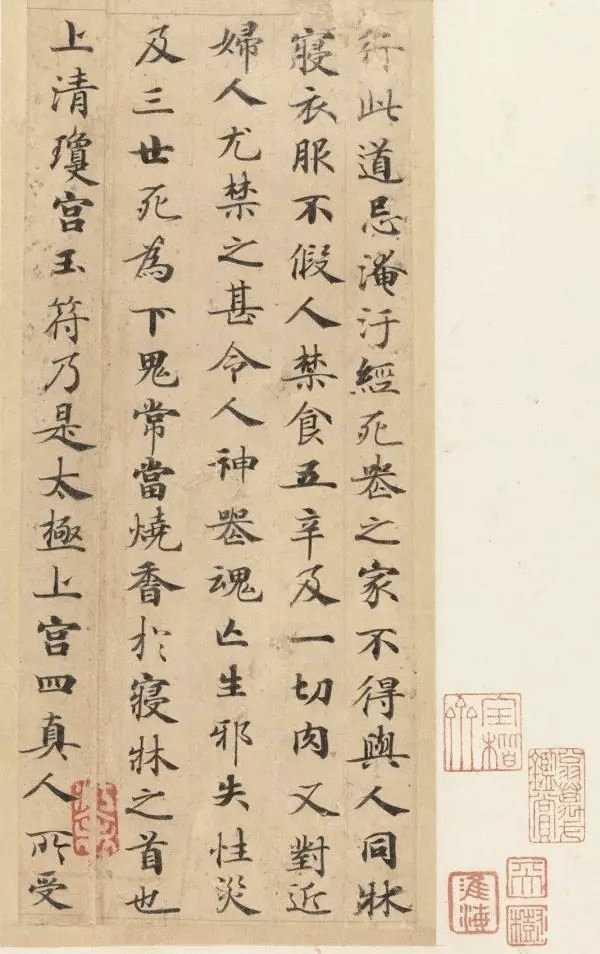
However, learning ancient calligraphy is much more difficult than today's hard-pen calligraphy, and it is not suitable for everyone. Therefore, students who are new to practicing should first consider modern calligraphy.
Today, someone explains the calligraphy with strokes as shown below:
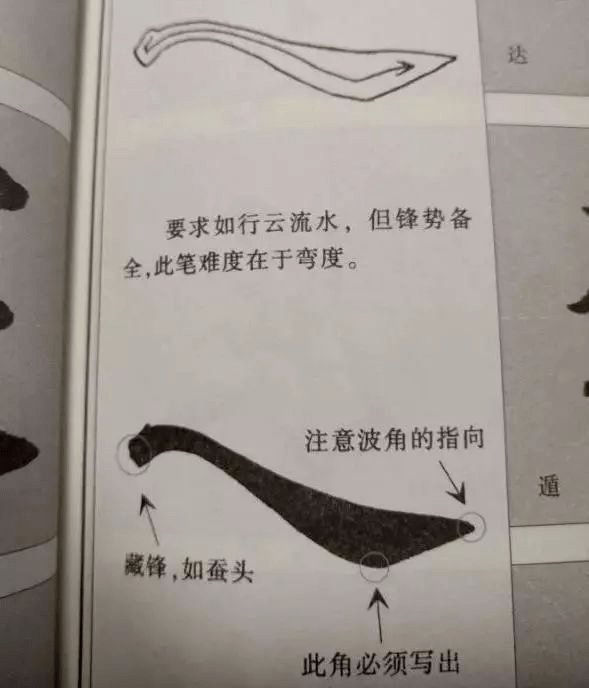
This book is "Introduction Tutorial on Brush Regular Script - Basic Strokes" by teacher Tian Yingzhang.
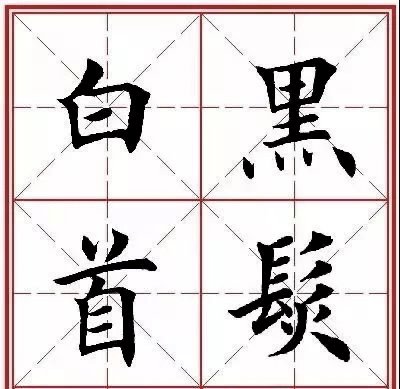
There is also Lu Zhongnan's "Three Hundred Tang Poems" in small regular script.
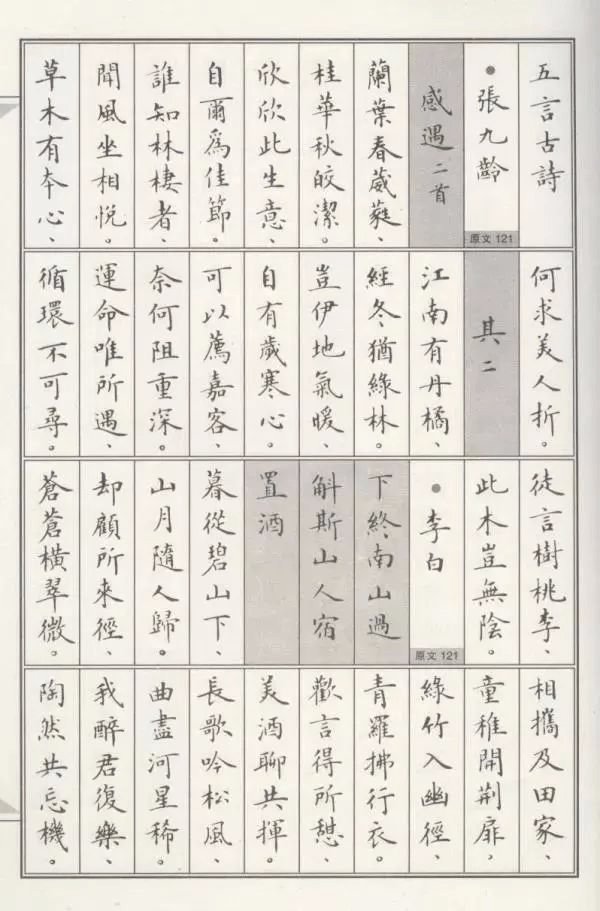
4. The highlight: How to practice?
1. Try not to use red when posting.
Tracing red refers to copying on paper printed with red characters or hollow red characters. Beginners can use this method.
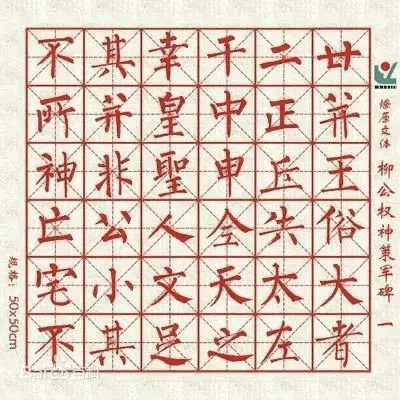
Only temporary posts are the best way to practice calligraphy!
Lin Tie means putting the copybook aside, looking at it, and writing word by word on the paper.
There is a big difference between the handwritten calligraphy and the description. Although both are imitations, the handwritten calligraphy has a more personal style.
2. Take your children to read posts. What should you read?
Read the glyphs, read the structure, read the strokes. Analyze and figure out the stroke characteristics of characters and the relationship between strokes.
At this time, the importance of the rice grid is reflected.
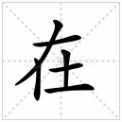
1. The first horizontal stroke must be above the horizontal center line;
2. The second stroke starts from the vertical center line and ends at the lower left grid;
3. Start the third stroke at the intersection of the vertical and horizontal midlines;
4. The first horizontal line of the word "Tu" is basically close to the bottom of the horizontal center line, going diagonally upward from left to right, and closing the pen on the horizontal center line;
5. The vertical part of the earth character must be on the right side of the vertical center line;
6. The last horizontal line should be longer than the first horizontal line of the word "Tu".
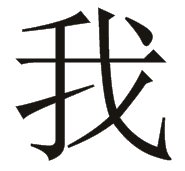
1. The first stroke should fall on the upper left grid, above the horizontal center line and to the left of the vertical center line;
2. The second horizontal stroke starts from the middle line of the horizontal stroke and goes upward diagonally;
3. The vertical hook passes through the horizontal center line, and the pen is closed in the lower left grid;
4. Lift it on the lower left grid and never exceed the center point of the field grid;
5. Lift the pen diagonally on the vertical center line, close the pen on the lower right square, and make it higher than the first stroke;
6. The fifth stroke should start from the horizontal center line, cross the lower right square, and end the pen at the lower left square;
7. Click on the upper right grid.
After each word is analyzed, let the child look at the grid and repeat it again. After the retelling is complete and clear, start writing again. This also cultivates and strengthens children's ability to observe carefully.
Some people may think that almost is not bad. However, one word is just a little bit off, two words are a little bit off, every word is a little bit off, what is the result of writing a whole article?
The best way to get it is to get it from the middle. If you take the method to the middle, you will only get the bottom.
5. Grasp the core of calligraphy practice
The goal of practicing calligraphy is to break the inherent habits and form new and more reasonable writing habits.
The core of calligraphy practice is change.
Many parents buy copybooks for their children to practice calligraphy and copywriting. After finishing writing in the copybooks they bought, their children’s handwriting does not improve. Why?
It means that when children practice calligraphy, they have not mastered the pen used for writing, the correct method of holding the pen, and the structural rules, and have not changed their habits.
How to change habits? Method + persistence.
According to what was mentioned above, there is already a correct method, and the next goal is to persist and break the habit.
So how to guide children to persist?
1. Give timely feedback
When parents are tutoring their children when they are writing, they should often give them some encouragement. For example, if the children can write better than before, parents can tell them what is good; if the children are not good at writing, then they can help analyze it. guide.
2. Children should not practice calligraphy for too long
Considering the age characteristics of the children, the time for practicing calligraphy should not be too long, preferably about 30 minutes. If the child wants to continue practicing calligraphy, the time can be appropriately extended.
If your child practices calligraphy in the correct way and is diligent on his own, he will be able to see the results quickly, and of course he will be able to persist for a longer period of time.
The above summary, I hope it will be of some help to parents.


